Spring Boot RESTful 在线API文档
发表于|更新于
|字数总计:828|阅读时长:3分钟|阅读量:
使用Spring Boot 去开发一个RESTful API是一件简单的事情,而且Spring Boot结合Swagger后,使用注解就能简单的实现在线API文档,这样能实现修改代码和修改文档二合一,降低开发人员造成文档和接口的不一致的几率。以下为具体实现。
引入swagger的相关依赖
<dependency>
          <groupId>io.springfox</groupId>
          <artifactId>springfox-swagger2</artifactId>
          <version>2.2.2</version>
      </dependency>
      <dependency>
          <groupId>io.springfox</groupId>
          <artifactId>springfox-swagger-ui</artifactId>
          <version>2.2.2</version>
      </dependency>
|
编写swagger配置类
swagger的配置类可以放在Spring Boot入口类的旁边
@Configuration
@EnableSwagger2
public class Swagger2Configuration {
@Bean
public Docket buildDocket() {
return new Docket(DocumentationType.SWAGGER_2)
.apiInfo(buildApiInf())
.select()
.apis(RequestHandlerSelectors.basePackage("com.lefer.demo4doc.controller"))
.paths(PathSelectors.any())
.build();
}
private ApiInfo buildApiInf() {
return new ApiInfoBuilder()
.title("CDR在线文档")
.contact("winning")
.version("0.1")
.build();
}
}
|
在api接口上添加注解
@Api(value = "字符串处理服务",description = "简单的字符串处理,提供截取、替换、查询API")
@RestController
@RequestMapping(path = "/api")
public class ApiController {
    @ApiOperation(value = "截取字符串")
    @RequestMapping(path = "/substr",method = RequestMethod.POST)
    public Result subStr(@ApiParam(required = true,value = "待处理字符串") @RequestParam String str,
                         @ApiParam(required = true,value = "截取开始位置") @RequestParam int from,
                         @ApiParam(required = true,value = "截取结束位置") @RequestParam int to) {
        return ResultGenerator.genSuccessResult(str.substring(from,to));
    }
    @ApiOperation(value = "连接字符串")
    @RequestMapping(path = "/joinstr",method = RequestMethod.POST)
    public Result joinStr(@ApiParam(required = true,value = "待处理字符串") @RequestParam String str1,
                         @ApiParam(required = true,value = "需连接字符串") @RequestParam String str2) {
        return ResultGenerator.genSuccessResult(str1.concat(str2));
    }

    @ApiIgnore
    @RequestMapping(path="/giveback",method = RequestMethod.POST)
    public Object giveBack(){
        Article article = new Article();
        article.setId("123");
        article.setTitle("test");
        article.setContent("hahahatest");
        try{
            CustomerJsonSerializer cjs = new CustomerJsonSerializer();
            cjs.filter(Article.class,null,"title");
            String result = cjs.toJson(article);
            return result;
        }catch (Exception e){

        }
        return article;
    }

    @ApiIgnore
    @JsonView(View.Summary2.class)
    @RequestMapping(path="/test",method = RequestMethod.POST)
    public Result test(){
        Article article = new Article();
        article.setId("123");
        article.setTitle("test");
        article.setContent("hahahatest");
        return ResultGenerator.genSuccessResult(article);
    }
}
|
核心的的注解有以下几个
@Api 注解在Class上,用以描述整个类的功能
@ApiOperation 注解在方法上,用以描述API方法的功能
@ApiParam 注解在方法的入参上,用以描述入参,如果是必需的参数,可以用required = true标明
@ApiIgnore 注解在方法上,指示swagger忽略该api
出参的注解需要注解到响应类上,比如以上的代码中都是通过Result类去响应请求的,对应Result类上的代码:
@ApiModel("统一响应模型")
public class Result {
@ApiModelProperty("响应状态")
private int status;
@ApiModelProperty("响应消息")
private String message;
@ApiModelProperty("响应数据")
private Object data;
}
|
核心的的注解有以下几个
@ApiModel 注解在模型类上,描述类
@ApiModelProperty 注解在属性上,用于描述属性
至此,大功告成,运行工程,访问 http://localhost:port/swagger-ui.html 即可查看效果
展现效果

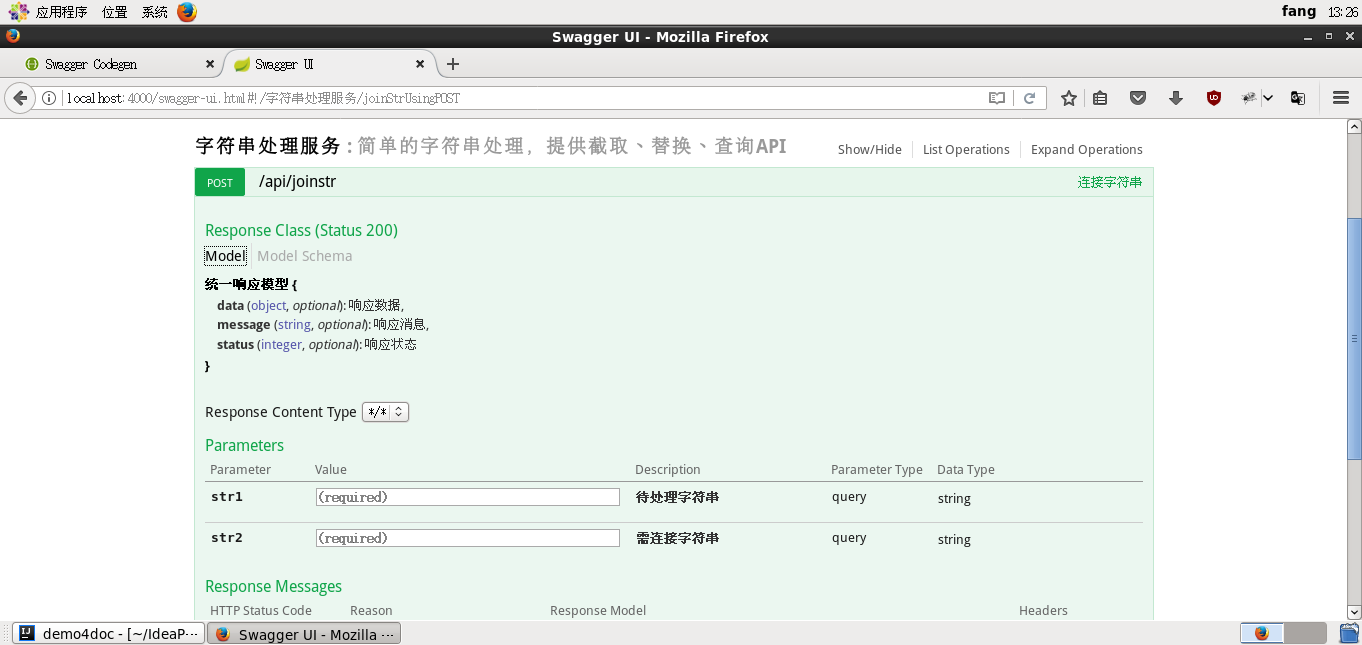
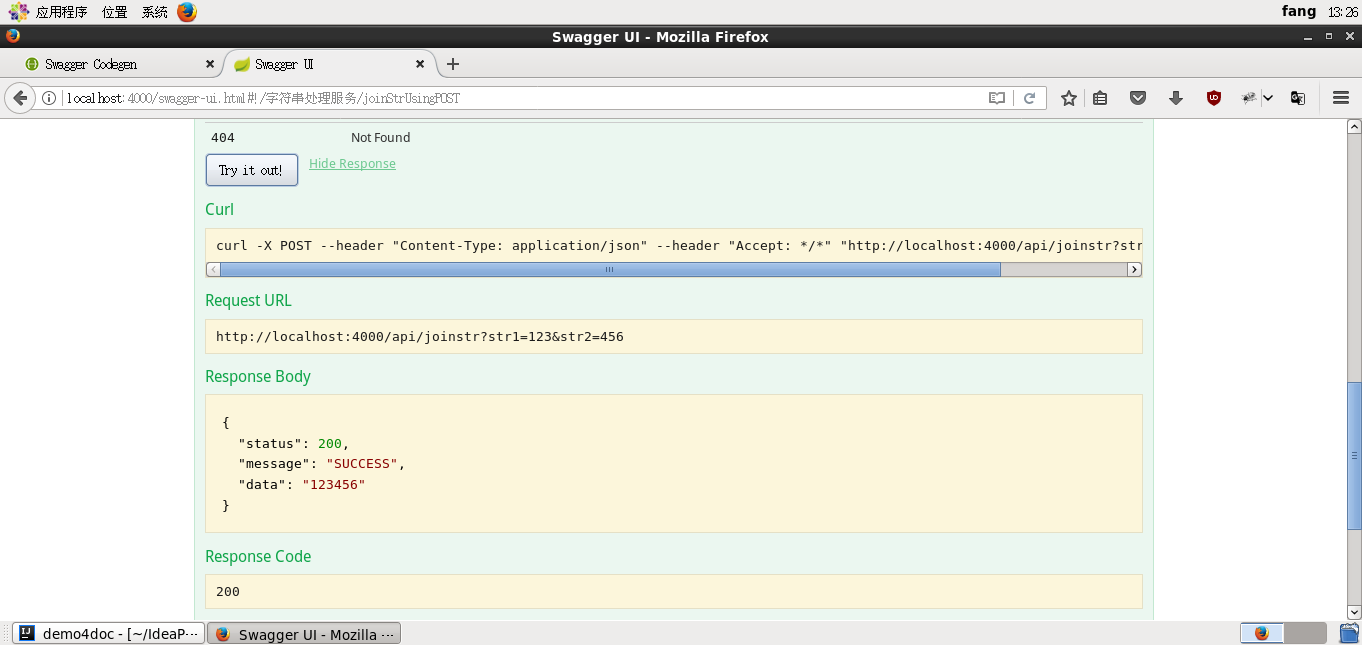
END